how to use custom domain on blogger?
Map your domain to your blog:
You can map your domain purchased from HIOX India to your blog by following the step by step procedure given below. This will help you to use custom domain on blogger, say yourdomainname.com.
To do this, you have to make changes in two settings,
1. Blogger Settings in Blogger Account
2. Domain Settings in HIOX India Client Account
1. Blogger Settings in Blogger Account:
To Configure Your Blogger Account to Use Custom Domain on Blogger,
Step 1: Log in to your Blogger account.
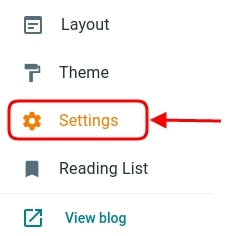
Step 2: Click on Settings in the left panel.
Step 3: Scroll and click on Custom Domain under Publishing.
Step 4: Type the URL of the domain you have purchased along and click Save.
Note:
You must enter the domain name with www in order to work.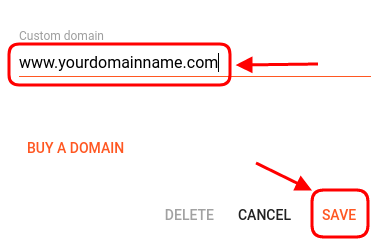
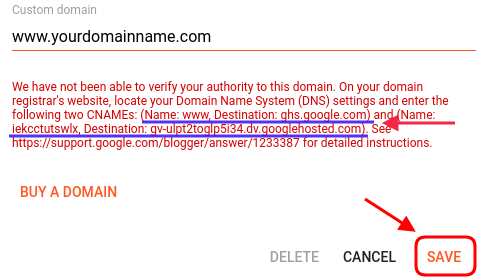
Step 5: You will get an error with two CNAMEs as given in the below picture. First one is your Blog CNAME (Name: www, Destination: ghs.google.com) and second will be your Security CNAME. These are the 2 CNAMEs that needs to be updated in your HIOX India client account.
2. Domain Settings in Hiox India Client Account:
(i) Update CNAME Records To Your Domain Name:Now, you have to update the CNAME details shown in the blogger settings screen for your domain purchased from Hiox India.
Step 1: To update those CNAME details, login to your
Hiox India Client Account.
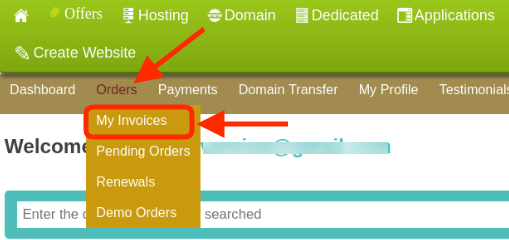
Step 2: Goto Orders -> My Invoices
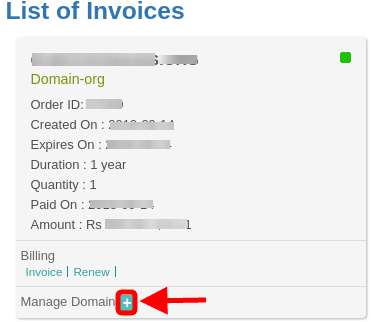
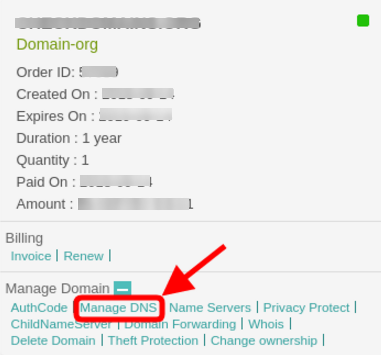
Step 3: Find the invoice of domain for which you want to update the CNAME details and click on Manage Domain under it. You can see an expanded menu, now click on Manage DNS.
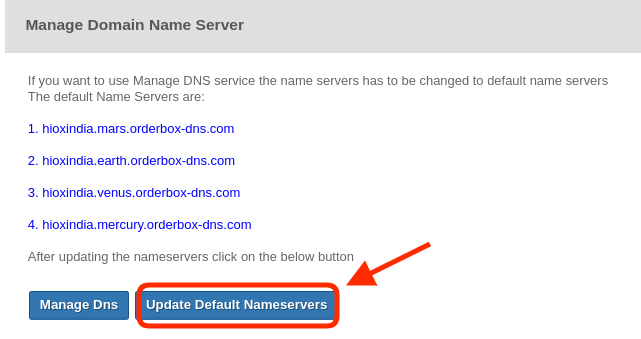
Step 4: Click on Update Default Nameservers to enable the 'Manage DNS'.
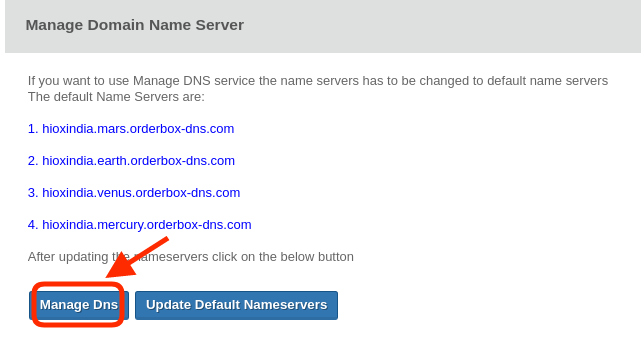
Step 5: Once updated, click the Manage DNS button.
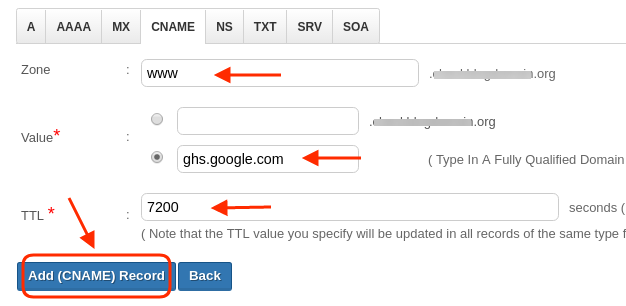
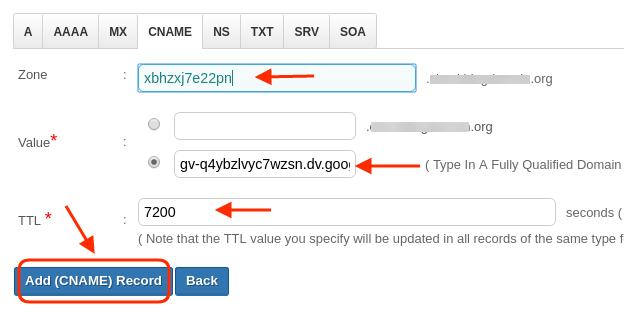
Step 6: Choose the tab 'CName' and click on
Add CName Record.
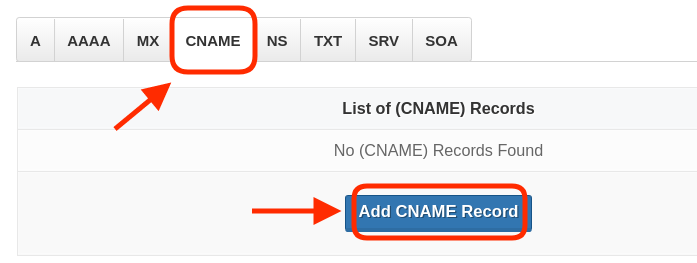
Step 7: Update both the CNAME records one by one from your Blogger setting screen. You can save both the records individually.
First Record:
Second Record:
Step 8: Once after updating, ensure that you have added the same record which is shown in your Blogger Setting Screen.
Note: Please ensure there are no conflicting records (A, CNAME, URL redirect records with different values but set for the same hosts) for your domain. If there are any, you will need to remove it.
(ii) Add 'A Records' To Your Domain Name:
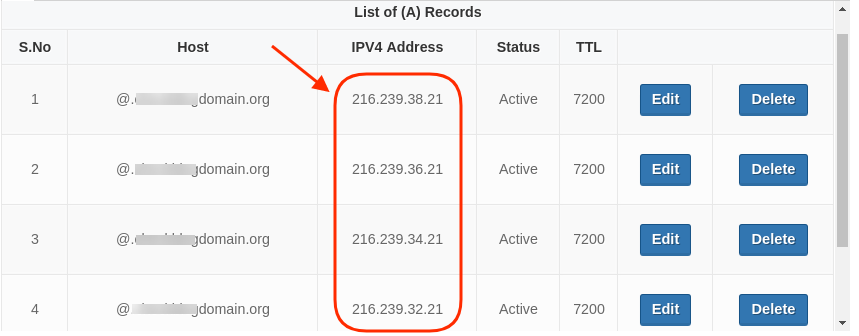
After updating CNAME details, to complete the configuration process, you should add the below given 'A' records to your main domain in order to use custom domain on blogger.
A Records:
216.239.32.21
216.239.34.21
216.239.36.21
216.239.38.21
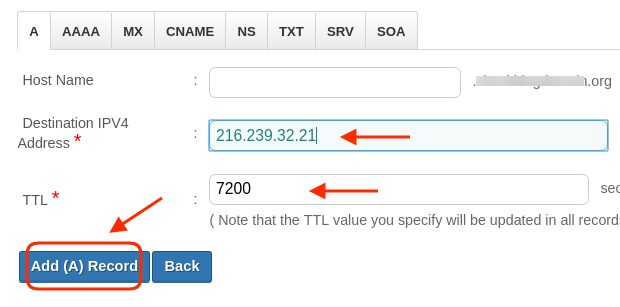
Step 1: To update this, choose Tab 'A' and click on Add A Record.
Step 2: Update the first A record as shown in the below picture leaving the Host Name section empty.
Step 3: Similarly, update all the other three A Records.
Step 4: Now, you need to go back to your BlogSpot dashboard, and click on Save.
Note: The propagation period may take upto 24 hours. Please be patient until the propagation process gets complete. Only after the completion of propagation, the saved changes will reflect on your domain globally.
How this faq is helpful:
 Accredited Registrar
 Accredited Registrar
