Contact Us
Contact Us
+91-7708009900
 Accredited Registrar
Accredited Registrar
Accredited Registrar
How to add / modify / delete MX record in Direct Admin Panel?
Step 1 : Login to DirectAdmin control panel. (Please check your hosting configuration mail from HIOX India for the username and password details)
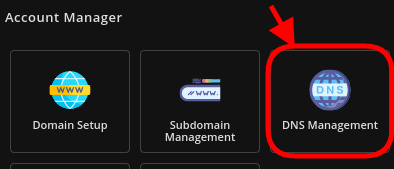
Step 2 : Goto -> Account Manager -> DNS Management
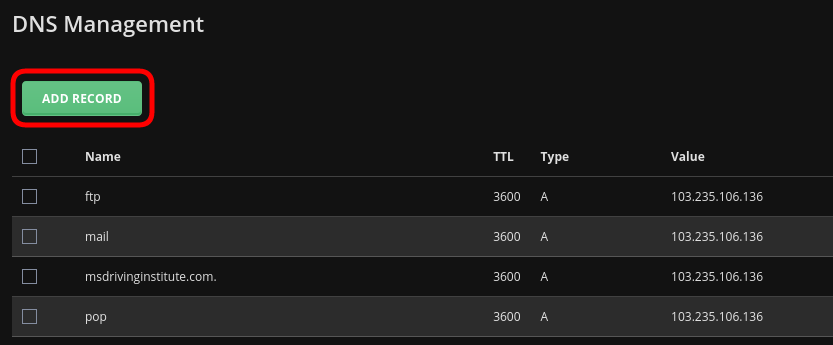
Step 3 : You will find the default records listed. Click on ADD RECORD to add new DNS record.
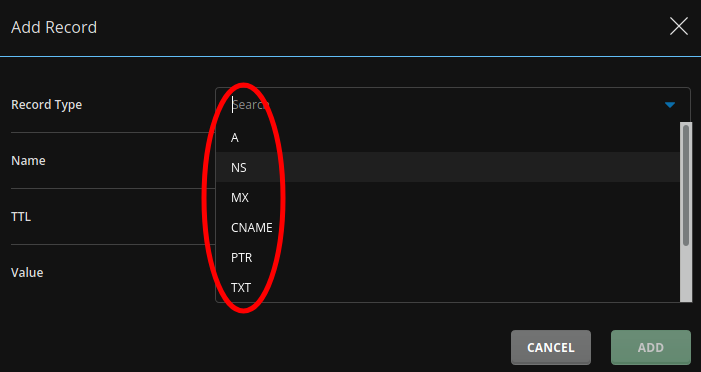
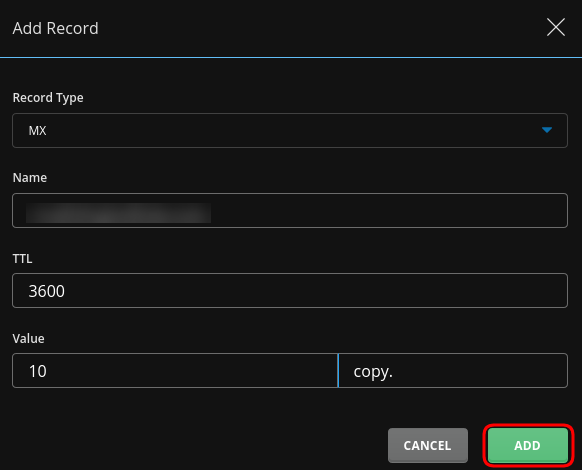
Step 4 : A dialog box would appear, choose Mx record from the drop down box.
Step 5 : Enter the required inputs and click on Add Record.
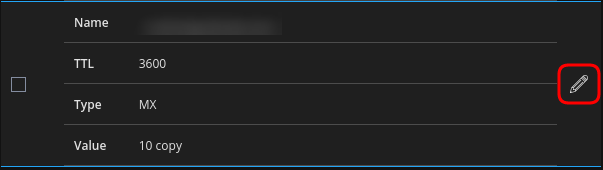
Step 5 : To Edit a MX record, Click on the edit icon on the right corner of the respective entry.
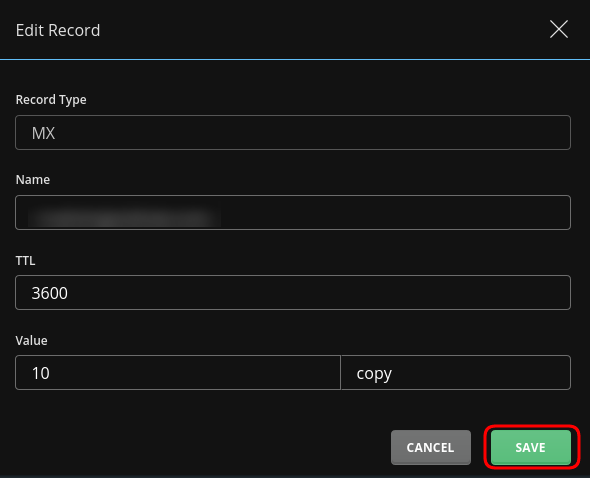
Step 6 : A dialog box would appear, just fill in the details and click on SAVE.
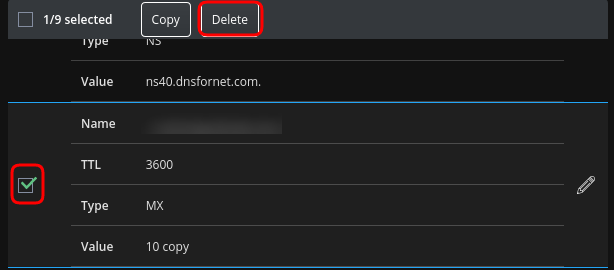
Step 7 : To Delete a MX Record, Check the record you wish to delete and click the Delete Button that appears.
|
Not at all
helpful Not much
helpful Some what
helpful Very
helpful Extremely
helpful | ||||||||
What could be better? (Optional)
X
Not related to my issue
Too complicated explanations
Too much information
Incorrect information
Unclear information
Incomplete information
Too old information
Do you have any other feedback about this faq ? 1000
| ||||||||
 ]
]


